Followers

iPhone 2G, 3G and 3GS Firmwares

Some Firmware on Apple iPhone Products

Iphone 2G

1.0 - 1.0.1 - 1.0.2 - 1.1.1 - 1.1.2 - 1.1.3 - 1.1.4 - 2.0 - 2.0.1 - 2.0.2 - 2.1 - 2.2 - 2.2.1 -

Iphone 3G

2.0 - 2.0.1 - 2.0.2 - 2.1 - 2.2 - 2.2.1 - 3.0 - 3.1 - 3.0.1 - 3.1.2 - 3.1.3


Iphone 3Gs

3.0 - 3.0.1 - 3.1 - 3.1.2 - 3.1.3


I-Phone Custom Firmwares


IPhone 3G (s)

3G (s) 3.1.2


3.1.2-1GB Root Partition, UNACTIVATED, Cydia, Stock Boot Logos

3.1.2-1GB Root Partition, ACTIVATED, Cydia, Stock Boot Logos

IPhone 3G

3G 3.1.2


3.1.2-1GB Root Partition, UNACTIVATED, Cydia, Stock Boot Logos

3.1.2-1GB Root Partition, ACTIVATED, Cydia, Stock Boot Logos

3G 3.1 Activated:
3G 3.1 Unactivated:
3G 3.1 1GB Activated:
3G 3.1 1GB Unactivated:
IPhone 2G

2G 3.1.2


3.1.2-1GB Root Partition, UNACTIVATED, Cydia, Stock Boot Logos

3.1.2-1GB Root Partition, ACTIVATED, Cydia, Stock Boot Logos

2G 3.1 Activated Unlocked:
2G 3.1 Unactivated Unlocked:
IPod Touch (2G)

3.1.2-1GB Root Partition, Cydia, Stock Boot Logos

IPod Touch (1G)

3.1.2-1GB Root Partition, Cydia, Stock Boot Logos

ITouch 1G (Default Partition Size)
  • iPhone Custom Firmware 3.1.3
iPhone2_1_3.1.3_7E18_Custom_Restore_Activated.zip. 001
iPhone2_1_3.1.3_7E18_Custom_Restore_Activated.zip. 002
iPhone2_1_3.1.3_7E18_Custom_Restore_Activated.zip. 003
iPhone2_1_3.1.3_7E18_Custom_Restore_Activated.zip. 004

NOT Activated (for Official Carrier Users)
iPhone2_1_3.1.3_7E18_Custom_Restore_NOT_Activated. zip.001
iPhone2_1_3.1.3_7E18_Custom_Restore_NOT_Activated. zip.002
iPhone2_1_3.1.3_7E18_Custom_Restore_NOT_Activated. zip.003
iPhone2_1_3.1.3_7E18_Custom_Restore_NOT_Activated. zip.004

iPhone 3G Custom Firmware 3.1.3 IPSW

Activated (for UnOfficial Carrier Users)
iPhone1_2_3.1.3_7E18_Custom_Restore_Activated.zip. 001
iPhone1_2_3.1.3_7E18_Custom_Restore_Activated.zip. 002
iPhone1_2_3.1.3_7E18_Custom_Restore_Activated.zip. 003

NOT Activated (for Official Carrier Users)
iPhone1_2_3.1.3_7E18_Custom_Restore_NOT_Activated. zip.001
iPhone1_2_3.1.3_7E18_Custom_Restore_NOT_Activated. zip.002
iPhone1_2_3.1.3_7E18_Custom_Restore_NOT_Activated. zip.003
iPhone 2G Custom Firmware 3.1.3 IPSW

Activated (for UnOfficial Carrier Users)
iPhone1_1_3.1.3_7E18_Custom_Restore_Activated.zip. 001
iPhone1_1_3.1.3_7E18_Custom_Restore_Activated.zip. 002
iPhone1_1_3.1.3_7E18_Custom_Restore_Activated.zip. 003

Guide to Downgrade iOS 4.3.5 To 4.3.4, 4.3.3, 4.3.2 Or 4.3.1 on iPhone, iPod Touch and iPad

Today Apple iOS 4.3.5 has just been released for iPhone, iPod Touch and iPad to fix a security issue with certificate validation issue. But if you accidentally updated your firmware to 4.3.5 and you had saved your SHSH blobs for iOS 4.3.4, 4.3.3, 4.3.2 or 4.3.1.


Geohot has the guide on how to downgrade from iOS 4.3.5 to any of  iOS 4.3.4, 4.3.3, 4.3.2 or 4.3.1.
Just follow the step by step procedure here at Geohot's blog.

Apple iPad 2 Factory Reset Contents and Settings Instruction

Some expected pure gold: a tablet that runs as fast as a laptop and weighs less than a newspaper.
Yet, the reality with the iPad 2 is that Apple has taken an iterative approach. In many ways, the iPad 2 is a crowd pleaser because it does not rock the boat.

apple ipad 2 reset manual
After installing and removing many apps, your iPad 2 might start acting up, and unexpected errors may occured.
Dont' worry, here's how to factory reset the Apple iPAD 2

   1. On your iPad 2 home screen, tap the Settings icon
   2. Tap General in the menu to the left of the screen, then tap Reset
   3. Here, you will have two options:
         1. "Reset All Settings" will restore all of your app settings to their original status
         2. "Erase All Content and Settings" will reset all app settings and erase all of your data (photos, apps, bookmarks, music, etc.)
   4. After selecting one of the two options above, your iPad 2 will reboot
   5. If you selected "Erase All Content and Settings", you will need to reconnect your iPad 2 to iTunes in order to reactivate it

Apple iPad Wifi 3G Not Charging via PC USB Problem Solution

Are you trying to charge your Apple iPad Wifi or 3G via USB port on your PC that runs Windows XP, Vista and 7 OS but happened that your iPad 3G or Wifi is not charging?
Relax, this is not a hardware failure issue, there is no thing to worry about,
This is due to the USB ports low power source on most of the Windows operating systems.


There is a solution for this, a simple driver update will fix the  problem.
Just download one of these  BIOS USB driver updates for your PC then installed it.
Then your Apple  iPad WIFI or 3G will then charge up faster.

HTC Sync - For Android Phones

HTC Sync™ lets you synchronize Outlook and Windows Address Book (Outlook Express), contacts and calendar events on your PC with your phone. It also lets you install third-party Android applications on the phone, and the Mobile Network sharing function as well.

Installation Instructions:
Note: This update is applicable globally for HTC Magic, HTC Hero, HTC Tattoo, HTC Legend & HTC Desire. (HTC Magic only supports contacts syncing.)
Version: 2.0.33

Improved Functions
1. Support new models: HTC Legend & HTC Desire.
2. Support for Outlook 2000.
3. Support for Finnish & Portuguese (Brazil)

1. Hardware Requirements (PC)
1 GHz or higher processor clock speed recommended
512 MB of RAM or higher recommended
Super VGA (800 x 600) or higher-resolution video adapter and monitor
50 MB of available free hard disk space
USB 2.0 is required

2. Software Requirements - Supported Operating Systems (PC)
Windows XP Service Pack 2 and 3
Windows Vista 32-bit version
Windows Vista 64-bit version
Windows 7 32-bit version
Windows 7 64-bit version

3. Installation Instructions
1. Click Download below to download “HTC Sync.exe” to your PC.
2. Run “HTC Sync.exe” to install it to your PC (Suggestion: Please close all running programs and temporarily exit your anti-virus program when you install the HTC Sync)
3. From your PC, launch HTC Sync, and use the USB cable to connect your phone to the PC (if the phone is not connected to the PC there will be a sync failure).
4. On your phone, check Notifications on the status bar for the icon to confirm if HTC Sync recognizes the phone.
5. The first time you synchronize the phone, the Synchronization Settings Wizard will start automatically to help you set up HTC Sync. (If the Synchronization Settings Wizard does not start, click Synchronize now on the HTC Sync screen.)


After the first time, to start syncing your phone to your computer, pull down the notifications bar on the phone and tap “Synchronize your phone with Windows” to connect to the PC
6. On your PC, follow the instructions to finish the wizard on the HTC Sync screen.


Note!
* If you have installed older version HTC Sync on your PC or NB, please uninstall the older version first.

* The installation process takes up to 10 minutes. It is recommended that you close all programs on your PC prior to starting the installation program and do not open any applications or files while the installation is in process.


Download code


PHP Code:
http://member.america.htc.com/download/Driver/%5CHTC%20Legend%5CHTCSync.exe 


* Copy n paste this code into download manager.


Download 2


Application Upgrade - HTC Sync 2.0.33

Miror

How to Create a Gold Card - For Android Phones

Gold Card - For Android Phones

Step by step guide on how to create a goldcard for Android and other smartphones. A GoldCard is a special SD card which, when inserted into your device, allows you to flash RUU files with a different CID to your own device. For example, if you own a T-Mobile branded device, this will allow you to flash a generic ROM.

  • Spare microSD card
  • Windows PC (recommended)
  • ADB (part of the tools folder of the SDK, available for download here
  • HxD Hex Editor, available for download here
  •  
1. Format the microSD card to FAT32 format – name the card as anything you like although I suggest naming it GoldCard
2. Put the microSD card in your device and boot it.
3. Connect the phone to your PC using the MicroUSB to USB cable
4. Put the phone into HTC Sync Mode and ensure USB debugging is enabled
5. Ensure you have unzipped the SDK, then open a command prompt to the extract location. Change to the 'tools directory.
6. Enter 'adb shell cat /sys/class/mmc_host/mmc1/mmc1:*/cid' and press enter. You should get a very long number which looks like this: 532600bd227d9c0347329407514d5402. If it says 'adb server is out of date', ignore this, as long as you get the long number.
7. Visit this page and paste in your number and reverse it. In our example the result would be 00544d5107943247039c7d22bd002653 – It’s actually reversing pairs of numbers and replacing the first pair with 00 (e.g. last pair is 02 so this becomes 00, next to last pair is 54 so the start of the reversed number is 0054 etc).
8. Visit this page and enter your reversed number and create your goldcard image, which will be e-mailed to you.
9. Save the goldcard.img file that was sent via email to your hard drive
10. Change the USB mode on your device from HTC Sync to Disk Drive (alternatively, turn off device, remove card and place into USB card reader). Make sure the removable drive is now visible in Windows Explorer.
11. Open the HxD hex editor. If you are using Windows Vista or Windows 7, you must run the application as administrator.
12. Go to the 'Extra' menu and select 'Open Disk'. Under physical disk, select Removable Disk (your microSD card), uncheck 'Open as Readonly' and click OK. Note that you should select physical disk NOT the logical disk. This is important! Read any warning that may appear about possibly making your disk unreadable and click ok.
13. Go to the 'Extra' menu again and select 'Open Disk Image'. Open the goldcard image that you received by email.
14. Press OK when prompted for 'Sector Size' (selecting 512 (Hard disks/Floppy disks)) and click OK. You should now have two tabs - one is your removable disk, the other is your goldcard image.
15. Click on the goldcard image tab. Go to the 'Edit' menu, choose 'Select All' then select the 'Edit' menu again and select 'Copy'.
16. Click on the 'Removable Disk' tab. Highlight offset (line) 00000000 to offset (line) 00000170 (including the 00000170 line), then click on the 'Edit' menu and select 'Paste Write'.
17. Click on the 'File' menu and select 'Save', accepting the warning.
18. Click on the ‘File’ menu and select ‘Exit’ to close the program.

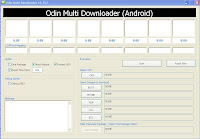
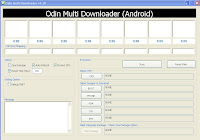
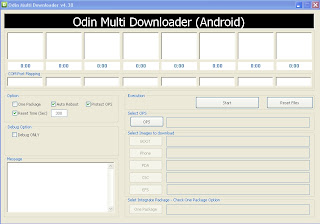
Odin Flasher and Original Ops & Pit File for Samsung Android Phone

Odin Flasher Tool for all Samsung Android firmware. The Odin flasher software has been used to manually install Samsung original stock firmware or ROM directly to the phone's system memory. This is also useful tool to fix some problems that seriously occurred on the device like soft-bricks and hard bricks, and total recovery of your device from scratched. I personally used this tool to fix some soft-bricks issues like severe hang problems that cannot revert back by any factory reset or hard reset. Returning back the device to original factory stock firmware, downgrading and upgrading the firmware.

Each Samsung Android devices uses a different Odin flasher version, below is a list Samsung android devices and which Odin version are going to use. This also includes all original OPS and PIT files for each specific devices that are used to fix 'Partition' area of the phones internal memory.

Odin Flasher v1.70


Odin3 v1.70 - This works on Samsung GT-I9000 Galaxy S, Samsung GT-I9010 Galaxy S, Samsung Galaxy Tab GT-P1000, Samsung Galaxy Tab wifi GT-P1010, Samsung GT-I9010 Galaxy S Giorgio Armani.
Download Odin3 v1.70

Odin Flasher v1.81


Odin Flasher v1.82


Odin Flasher v1.83


Odin3 v1.81, Odin3 v1.82 and Odin3 v.1.83 -  These three will work on Samsung  Galaxy S GT-I9000, Samsung  Galaxy S2/S II GT-I9100, Samsung Galaxy SL GT-I9003, Samsung Galaxy Giorgio Armani GT-I9010, Samsung Google Nexus S GT-I9020, Samsung Google Nexus S GT-I9020A, Samsung Google Nexus S GT-I9023, Samsung Galaxy Tab GT-P1000, Samsung Galaxy Tab wifi GT-P1010
Samsung Galaxy Note GT-N7000
Download Odin3 v1.81
Download Odin3 v1.82
Download Odin3 v1.83

Odin Flasher v.1.84

Odin3 v1.84 - This version can be used on Samsung Galaxy Y S5360, Samsung Galaxy Y GT-S5363, Samsung Galaxy Y Dous GT-S6102
Download Odin v1.84

Odin Flasher v1.85

Download Odin3 v1.85
Odin3 v1.85 - It can be used on most high-end devices like the Samsung Galaxy S II GT-I9100, Samsung Galaxy S II GT-I9100G, Samsung Galaxy S II GT-I9100P, Samsung Galaxy Y GT-S5360, Samsung Galaxy Y GT-S5363, Samsung Galaxy Tab wifi GT-P1010, Samsung Galaxy Tab 7.0 GT-P6200, Samsung Galaxy Tab 10.1v GT-P7100, Samsung Galaxy Tab 8.9 P7300, Samsung Galaxy Tab10.1 GT-P7500, Samsung Galaxy Tab 10.1 WiFi P7510, Samsung Galaxy Y Pro B5510, Samsung Galaxy Note N7000, Samsung Galaxy Tab 2 7.0 GT-P3113 and Samsung Galaxy S3 GT-I9300.
.
USA and Canada variants  (Note: the author not yet tested on some of these devices)
Samsung Galaxy S II Skyrocket SGH-I727
Samsung Galaxy S II LTE SGH-I727R
Samsung Galaxy S II SGH-I777
Samsung DoubleTime SGH-i857
Samsung Captivate Glide SGH-i927
Samsung Galaxy S Glide SGH-i927R
Samsung Galaxy Tab 8.9 LTE SGH-i957
Samsung Infuse 4G SGH-I997
Samsung Dart SGH-T499
Samsung Gravity Smart SGH-T589
Samsung Galaxy Q SGH-T589R
Samsung Galaxy Tab 7.0 Plus SGH-T869
Samsung Galaxy S Fascinate 4G SGH-T959P
Samsung Hercules SGH-T989 
SCH-I500 Mesmerize
SPH-M820 Prevail
SPH-M910 Intercept
SCH-R880 Acclaim
SCH-R910 Indulge
SGH-I897 Captivate
SGH-I997 Infuse
SGH-T589 Gravity
SGH-T839 Sidekick
SGH-T959 Vibrant
SGH-T959v Galaxy S 4G
SPH-D700 Epic 4G
SPH-D720 Nexus S 4G
SPH-M580 Replenish
SPH-M920 Transform
SCH-I400 Contunuum
SCH-I500 Fascinate
SCH-I510 Droid Charge
SGH-I917 Focus

Odin Flasher v3.98

Odin Multi Downloader v3.98 - This fully works on Samsung Galaxy GT-I7500.
Downloade Odin Multi Downloader v3.98 

Odin Flasher v4.03

Odin Multi Downloader v4.03 - Works on Samsung T919 Behold, Samsung T939 Behold 2
Download Odin Multi Downloader v4.03

Odin Flasher v4.16

Download Odin Multi Downloader v4.16
For Samsung GT-I7500 Galaxy,

Odin Flasher v4.252, v4.28 and v4.34


Download Odin Multi Downloader v4.252
Download Odin Multi Downloader v4.28
Download ODin Multi Downloader v4.34
These three version will work on Samsung GT-I5500 Galaxy Europa, Samsung Galaxy 551 GT-I5510, Samsung GT-I5700 Galaxy Spica, Samsung GT-I5800 Galaxy Apollo and Samsung GT-I7500 Galaxy,

Odin Flasher v4.38 and v4.42


Odin Multi Downloader v4.38
Odin Multi Downloader v4.42  
These two version will fully work on mid-range devices such as Samsung Galaxy Gio GT-S5660, Samsung Galaxy Mini GT-S5570, Samsung Galaxy Fit GT-S5670, Samsung Galaxy Ace GT-S5830, Samsung Galaxy Xcover GT-S5690, Samsung Galaxy Y Pro GT-B5510 , Samsung Galaxy Pro GT-B7510, Samsung Galaxy M Pro GT-B7800

Odin Flasher v4.43

ODIN Multi Downloader v4.43
Samsung Galaxy S Plus I9001, Samsung Galaxy W I8150,  Samsung Exhibit II 4G T679 (T-Mobile), Samsung Galaxy W T679M (Bell).

Original Odin OPS and PIT Files
OPS - the OPS file is needed most of the time during flashing any of specific android devices firmware.
PIT - the 'Pit' file is only used for full flashing and repairing system memory "Partition" area, it is not most often used during the firmware downgrading and upgrading. It is not needed when only upgrading and downgrading from original stock firmware.

OPS and Pit file for Samsung Android Phones
Samsung Galaxy Y Pro B5510 - Luisa_0623.pit link
Samsung Galaxy Pro B7510 - BENNETT_v1.0.ops link
Samsung Galaxy M Pro B7800 -
Samsung Galaxy Europa I5500 - EUROPA_v1.0.ops link
Samsung Galaxy 551 I5510 - CALLISTO.OPS link
Samsung Galaxy Spica I5700 - spica_jc3.ops link
Samsung Galaxy Apollo I5800 - apollo_0531.ops, 531.OPS link
Samsung Galaxy Saturn I6500 -
Samsung Galaxy I7500 - Orion.ops link
Samsung Galaxy W I8150- Ancora.OPS link
Samsung Galaxy Beam I8520 -
Samsung Galaxy S I9000 - s1_odin_20100512.pit s1_odin_20100513.pit, s1_odin_20100803.pit link
Samsung Galaxy S Plus I9001 - AriesVE.ops link
Samsung Galaxy SL (LCD) I9003 - latona_20110114.PIT link
Samsung Galaxy S Armani I9010 - GA3_add_hidden.pit link
Samsung Nexus S I9020 -
Samsung Nexus SL (LCD) I9023 -
Samsung Galaxy S II I9100 - u1_02_20110310_emmc_EXT4.pit link
Samsung Galaxy S II Tegra I9103 -
Samsung Galaxy Celox I9210 -
Samsung Nexus Prime I9250 - partition_table_0915.pit link
Samsung Galaxy Note N7000 - Q1_20110914_16GB.PIT link
Samsung Galaxy Y S5360 - totoro_0623.pit link
Samsung Galaxy Mini S5570 - TASS.OPS link
Samsung Galaxy Gio S5660 - GIO_v1.0.ops link
Samsung Galaxy Fit S5670 - BENI_V1.0.OPS link
Samsung Galaxy Ace S5830 - COOPER.OPS link
Samsung Epic 4G D700 - victory 8G_100528.pit.rar link

OPS and Pit file for Samsung Android Tablets
Samsung Galaxy Tab P1000 - P1_EUR_20100816.pit, Pit-909.pit,
EUR.pit, P1.pit, gt-p1000_mr.pit  link
Samsung Galaxy Tab Wifi P1010- p1wifi_20110128_r10_00.pit link
Samsung Galaxy Tab 7.0 P6200 -
Samsung Galaxy Tab 7.0 Wifi P6210-
Samsung Galaxy Tab 10.1v P7100 -
Samsung Galaxy Tab 8.9 P7300 - P5.PIT link
Samsung Galaxy Tab 8.9 Wifi P7310 - P5.PIT link
Samsung Galaxy Tab 10.1'' P7500 - android_fastboot_emmc_full_p4_16G_32G.pit link
Samsung Galaxy Tab 10.1'' wifi P7510 - android_fastboot_emmc_full_p4_16G_32G.pit link

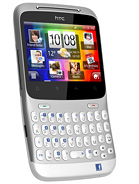
HTC ChaCha Format, Hard Reset to factory default settings

Here's the step by step procedures how to hard reset the HTC ChaCha to clear all data and restore it back to its original factory fresh default settings.

Please Note:  The result of this procedure will delete all data stored  from the HTC Salsa. The data stored on the microSD memory card  may or may not be deleted . We advice to back up all of important personal data before proceeding.

HTC ChaCha Factory Reset through Menu Settings
HTC chacha hard reset manual
   1. From the main home screen, select menu
   2. Select Settings, then Privacy
   3. Select Factory data reset
   4. Select Reset phone
   5. Enter the password if prompted, then select Erase everything to continue

If the HTC ChaCha is frozen, do a hard reset by way of button combination.

   1. If the device is frozen,turn the phone's power off.  remove the battery out and reinsert it in back again
   2. Press and Hold the Volume Down button
   3. Press and hold the Power button until the device turns on
   4. A menu will then appear that let you choose for Fastbook, Recovery, Clear Storage, and Simlock
   5. Select Clear Storage by pressing the Volume Down button
   6. Press and then release the Power button
   7. Then confirm, press Volume Up for YES and press Volume Down for NO

Once the the wipe completes, the phone will reboot to its factory default state settings. All data stored including third-party applications has been deleted from the HTC ChaCha. You need to reinstall third-party application again.

LG Optimus Me P350 Hard Reset to Factory Default Settings Instructions

Here's a step by step instruction on how to properly Hard reset the LG Optimus Me P350 also known as LG Pecan, If you want to return it to its factory settings again.

This procedures is only advisable if the you'd experience a hang or frozen problem in your device when using or opening any applications installed.
Please note that the result of this procedure will delete all data yoy previously installed on your handset.  This process may or may not delete data stored on the microSD card. Just do have a back up copy of all your important data on the device before proceeding.

LG Optimus Me P350 - Factory reset through menu settings:
LG hard reset manual
   1. On the main HOME screen, select MENU
   2. Select SETTINGS, then PRIVACY
   3. Select FACTORY DATA RESET
   4. Select RESET PHONE
   5. When Password is prompted, enter it. Then

If the problem still persists, or if the phone is frozen, you may then try to hard reset the
LG Optimus Me P350 through button combination.
  
  1. If your LG Optimus Me P350 is frozen, turn the Power OFF,  pull out the battery  and reinsert it back again.
   2. Hold the Home and Volume Down button
   3. Press and hold the Power button until the device turns on
   4. Follow the on-screen instructions on how to reset your LG Optimus Me P350

Wait 'till the process finish. Once the wipe is complete, the LG Optimus Me P350 phone will then reboot to its factory fresh default state settings. All data you previously installed on it already been deleted.

HTC Incredible S Soft/Hard Reset, Reformat to Factory Settings

This is a step by step instruction on how to Factory Reset and Hard Reset the HTC incredible S from HTC support.

Restarting your HTC Incredible S phone (soft reset)
If the phone is runa slower than normal, an application is not performing properly, or your phone becomes unresponsive, just try restarting your phone and see if that helps solve the problem.

To restart your phone, simply turn it off and back on. If pressing and holding the POWER button doesn't work, then remove the battery, wait for a few seconds, reinsert the battery, and then turn the phone on.
Performing a factory reset (hard reset)
If you're passing your phone on to someone else or your phone has a persistent problem that cannot be solved, you can do a factory reset (also called a hard reset). This returns your phone to the state it was in before the first time you turned it on.

Note: Performing factory reset will not delete the data and files that are stored in your phone’s microSD card.
However, It will permanently delete all your data and customized settings, any applications you've downloaded and installed will also remove . Be sure to back up any data and files you want to keep before you do a factory reset.

HTC incredible S - Factory reset via settings

1. From the Home screen, press MENU
2. Select Settings.
3. Scroll down the screen and
4. Then tap Privacy, select Factory data reset.
5. On the Factory data reset screen, tap Reset phone.
6. Then select Erase everything.

HTC incredible S - Performing a factory reset using phone button combination.
If you cannot turn on your phone or access the phone settings, you can still perform a factory reset by using the buttons on the phone.

1. With the HTC incredible S phone turned off, press and hold the VOLUME DOWN button, and then briefly press the POWER button.
Note: If you are not sure whether your phone's power is turned off, remove and then reinsert the battery.
2. Wait for the screen with the three Android images to appear, and then release the VOLUME DOWN button.
3. Press VOLUME DOWN to select CLEAR STORAGE, and then press POWER.
4. Press VOLUME UP to start the factory reset.

HTC Wildfire S Soft/Hard Reset, Format to Factory Settings

Note: Performing a hard reset  will permanently delete all your data and customized settings, any applications you've downloaded and installed on your  HTC Wildfire S will also remove .
factory reset will not delete the data and files that are stored in your phone’s microSD card.Be sure to back up any data and files you want to keep before you do a factory reset.

Restarting your HTC Wildfire S phone (soft reset)
If the phone is runs slower than normal, an application is not performing properly, or your phone becomes unresponsive, just try restarting your phone and see if that helps solve the problem.
To restart your phone, simply turn it off and back on. If pressing and holding the POWER button doesn't work, then remove the battery, wait for a few seconds, reinsert the battery, and then turn the phone on.

HTC Wildfire S - Factory reset via settings

1. From the Home screen, press MENU

2. Select Settings.

3. Scroll down the screen and

4. Then tap Privacy, select Factory data reset.

5. On the Factory data reset screen, tap Reset phone.

6. Then select Erase everything.


HTC Wildfire S- Performing a factory reset using phone button combination.

If you cannot turn on your phone or access the phone settings, you can still perform a factory reset by using the buttons on the phone.


1. With the HTC Wildfire S phone turned off, press and hold the VOLUME DOWN button, and then briefly press the POWER button.

Note: If you are not sure whether your phone's power is turned off, remove and then reinsert the battery.

2. Wait for the screen with the three Android images to appear, and then release the VOLUME DOWN button.

3. Press VOLUME DOWN to select CLEAR STORAGE, and then press POWER.

4. Press VOLUME UP to start the factory reset.

HTC Desire S Hard Reset, Format to Factory Default Settings

Note: Performing a hard reset  will permanently delete all your data and customized settings, any applications you've downloaded and installed on your  HTC Desire S will also wipe .
factory reset will not delete the data and files that are stored in your phone’s microSD card. Just ensure to back up any data and files you want to keep before you may proceed to a factory reset.

This is a step by step instruction on how to Factory Reset and Hard Reset the HTC Desire S from HTC support.

Restarting your HTC Desire S phone (soft reset)
If the phone is runs slower than normal, an application is not performing properly, or your phone becomes unresponsive, just try restarting your phone and see if that helps solve the problem.
To restart your phone, simply turn it off and back on. If pressing and holding the POWER button doesn't work, then remove the battery, wait for a few seconds, reinsert the battery, and then turn the phone on.


HTC Desire S - Factory reset via settings

1. From the Home screen, press MENU

2. Select Settings.

3. Scroll down the screen and

4. Then tap Privacy, select Factory data reset.

5. On the Factory data reset screen, tap Reset phone.

6. Then select Erase everything.


HTC Desire S- Performing a factory reset using phone button combination.

If you cannot turn on your phone or access the phone settings, you can still perform a factory reset by using the buttons on the phone.


1. With the HTC Desire S phone turned off, press and hold the VOLUME DOWN button, and then briefly press the POWER button.

Note: If you are not sure whether your phone's power is turned off, remove and then reinsert the battery.

2. Wait for the screen with the three Android images to appear, and then release the VOLUME DOWN button.

3. Press VOLUME DOWN to select CLEAR STORAGE, and then press POWER.

4. Press VOLUME UP to start the factory reset.

HTC Arrive Hard Reset, Format Factory Settings

The HTC ARRIVE is the first Sprint smartphone powered by Microsoft's Windows Phone 7.
Performing a hard reset may help if you want or decide to sell your HTC Arrive and buy a new device?This process will restore the phone to its original factory state default settings
your Arrive will be restored to a like-new state with all of your files and personal information cleared from memory.
htc arrive format factory reset

This is a simple instruction on how to hard reset your HTC Arrive:

   1. From the home screen, swipe left to expose your app list
   2. Tap Settings
   3. Scroll down and tap about
   4. Tap reset your phone
   5. Tap yes to confirm, then tap yes to confirm again

Once the reset process completes, It will then reboot and you'll be left with a factory fresh phone.

LG Optimus V VM670 Hard Reset, Format to Factory Settings Procedures

 Here, we give you tips on how to hard reset the LG Optimus V VM670 with step by step instructions.
This may help if the phone become sluggish than normal, or experience some hang up or frozen problem when using some applications.
LG Optimus V VM670 Hard Reset

Note: The result of this procedure will permanently deleted all data  from the LG Optimus V. The data stored on the microSD memory card will not be removed. Just have a back up copy all of your personal data before proceeding.

Factory Reset on the Menu Settings:

   1. From the main home screen, tap menu
   2. Tap Settings, then Privacy
   3. Tap Factory data reset
   4. Tap Reset phone
   5. Enter your password if required, then tap Erase everything to confirm

If the phone is frozen, you can still do a hard reset through button keys.

   1. If your LG Optimus V is frozen, Turn the power off. , take the battery out and reinsert it back again
   2. Hold the Home and Volume Down button
   3. Press and hold the Power button until the device turns on
   4. Follow the on-screen instructions to reset your device

The LG Optimus V will then reboot once the reset process completes, it will then back to its original factory default settings.

Samsung I100 Gem Hard Reset, Format to Factory Default Settings

 If  you want the Samsung I100 Gem to return it to its factory settings again. This procedure may help you to restore the phone from your customized settings to it s original state.

This may also help, if the phone become sluggish from normal, or become unresponsive and experince some hang or frozen problem if using some applications.

Here's step by step instructions  how to hard reset the Samsung Gem I100 .

Note: This will permanently deleted all data stored or installed on your phone. But the data stored on the microSD card will not be removed. Just make a back up copy of all important files for assurance before proceeding.

Factory Reset through Menu Settings,

samsung gem hard reset manual
   1. On the main home screen, tap menu
   2. Tap Settings, then tap Privacy
   3. Tap Factory data reset
   4. Tap Reset phone
   5. Enter the password if prompted, then to confirm just tap Erase everything

Hard Reset, this may help if the phone is unresponsive or frozen.

   1. If your Samsung Gem is frozen, Turn off the power, remove the battery  and reinsert it back again
   2. Hold the Volume Down button
   3. Press and hold the Power button until the device turns on
   4. You are now presented with a menu that allows for Fastbook, Recovery, Clear Storage, and Simlock
   5. Select Clear Storage by pressing the Volume Down button
   6. Press and release the Power button
   7. Select Volume Up for YES and Volume Down for NO
It will then reboot. Once the reset process completes, the Samsung Gem will then return to its original default factory settings.

Google Nexus S 4G Hard Reset Procedure

Here's how to hard reset the Google Nexus S 4G also known as Samsung SPH-D720. This will restore the phone data to original factory default settings. This help fix if the phone experience several error problem like frozen or unresponsive.

Please note: Make a back up copy of all your personal data first, before proceeding. The result of this procedure will delete all data from the Google Nexus S 4G.

Factory reset:

1. On the main home screen, select menu
2. Tap Settings, then Privacy
3. Select Factory data reset
4. Select Reset phone
5. Enter the password if prompted, then confirm by tapping Erase everything

Hard Reset:

1. Turn the power off. Take the battery out from the phone and reinsert it back again
2. Hold the Volume Down button
3. Press and release the Power button
4. You are now presented with a menu that allows for Fastbook, Recovery, Clear Storage, and Simlock
5. Select Clear Storage by pressing the Volume Down button
6. Press and release the Power button
7. Confirm by selecting: Volume Up for YES and Volume Down for NO

Once the wipe is complete, the phone will reboot to its factory fresh state.

T-Mobile LG G2X Hard Reset

Here's the procedure on how to hard reset the LG G2x to clear all data and restore its original settings.

Be aware that the result of this process will delete all the data stored on the device.. We recommend to make a back up copy of all your personal data before proceeding. Performing a hard reset is only advisable if the phone experience several error problems like frozen or unresponsive.

Here's how to factory reset the phone safely, you may try this first.

1. From the home screen, select Menu
2. Select Settings,
3. Select Privacy
4. Select Factory data reset
5. Select Reset phone
6. Enter the password if prompted,
7. Then confirm by selecting Erase everything


Hard reset the LG G2x - this may help if the phone is frozen but this will delete all data you previously installed on the device.
1. Turn OFF the phone's power then take the battery out from the device and reinsert it back again.
2. Hold the Volume Down button
3. Briefly press and hold the Power button until the phone turns on
4. A menu appears: Fastbook, Recovery, Clear Storage, and Simlock
5. Just select Clear Storage by pressing the Volume Down button
6. Press and release the Power button
7. Select Volume Up for YES and Volume Down for NO
Wait 'till the phone completely reboot..

All data including 3rd-party applications you installed on your LG G2X already wipe out. You need to re-install it back again. Enjoy!

HTC EVO 3D Hard Reset Procedure

This are the procedures to soft/hard reset the HTC EVO 3D to its original factory default settings.

Note: Performing a factory reset is only advisable if you want to return back the phone to its original factory default settings and also fix some abnormal functions of the device. We recommend to have a back up copy  all of your personal data before proceeding because the result of this process will delete all data you previously installed on the device.


HTC EVO 3D Factory data reset:

1. On the main home screen, select menu
2. Select Settings, then Privacy
3. Select Factory data reset
4. Select Reset phone
5. Enter the password if prompted, then confirm by selecting Erase everything

HTC EVO 3D Hard reset, this may help if the phone experience some hang or frozen on some applications:

1. Turn the phone's power off. Take the battery out from the device, wait a couple of seconds and reinsert it back again.
2. Gently, Press and Hold the Volume Down button
3. Then also press and hold the Power button until the device turns on
4. A menu will then appear like: Fastbook, Recovery, Clear Storage, and Simlock
5. Just select Clear Storage by pressing the Volume Down button
6. Then press and release the Power button
7. Select Volume Up if YES and Volume Down for NO

The phone will then reboot to its factory fresh state settings, once the reset process is completes.

Any data including third-party applications previously stored from the HTC EVO 3D already wiped or deleted.

Samsung DROID Charge Hard Reset, Wipe and Restore to Factory Settings

Here's a step by step instructions on how to hard reset the Samsung DROID Charge.Also known as Samsung SCH-i520, Samsung Inspiration, Samsung 4G LTE, Samsung Stealth V
OS     Android OS, v2.2 (Froyo)
CPU     1 GHz ARM Cortex-A8 processor, Hummingbird chipset

Precautions: This process will delete or wipe all data from the Samsung DROID Charge. We advise to have a back up copy of all your important files stored on the device.

Factory Data Reset procedures:

   1. On the main home screen, tap menu
   2. Select Settings, then Privacy
   3. Select Factory data reset
   4. Select Reset phone
   5. Enter the password if prompted, then select Erase everything.

If your Samsung DROID Charge is frozen: Reboot or restart the phone.

   1. Turn the power off. , take the battery out and reinsert it back again
   2. Hold the Volume Down and Power Button
   3. A menu will then show up such as Fastbook, Recovery, Clear Storage, and Simlock
   4. Select Clear Storage by pressing the Volume Down button
   5. Press and release the Power button
   6. Select: Volume Up for YES and Volume Down for NO

Wait 'till the phone reboot, once the wipe process completes, the Samsung DROID Charge will return to its original factory fresh state default settings.
All data including third-party applications will be deleted from the Samsung DROID Charge.So you may need to re-install it back again. 

HTC Sensation 4G Hard Reset, Wipe Data to Factory Default Settings

Here's a step by step instructions on how to hard reset the HTC Sensation 4G.
OS     Android OS, v2.3 (Gingerbread)
CPU     1.2 GHz dual-core processor, Adreno 220 GPU, Qualcomm MSM 8260 Snapdragon
Precautions: This process will delete or wipe all data from the HTC Sensation 4G. Don't forget to
to have a back up copy of all your important files stored on the device before proceeding.

Factory Data Reset procedures:

   1. On the main home screen, tap menu
   2. Select Settings, then Privacy
   3. Select Factory data reset
   4. Select Reset phone
   5. Enter the password if prompted, then select Erase everything.

If the HTC Sensation 4G is frozen: Reboot or restart the phone and do a hard reset through
button combination.

   1. Turn the power off. , take the battery out and reinsert it back again
   2. Hold the Volume Down and Power Button
   3. A menu will then show up such as Fastbook, Recovery, Clear Storage, and Simlock
   4. Select Clear Storage by pressing the Volume Down button
   5. Press and release the Power button
   6. Select: Volume Up for YES and Volume Down for NO

Wait 'till the phone reboot, once the wipe process completes, the HTC Sensation 4G  will then return to its original factory fresh state default settings.
All data including third-party applications will be deleted from the HTC Sensation 4G .So you may need to re-install it back again.

Kyocera ECHO M9300 Hard Reset to Factory Settings Procedures

These is the step by step procedures on how to hard reset the Kyocera M9300 ECHO  with Android OS, v2.2 (Froyo), 1GHz Scorpion processor, Qualcomm QSD 8650 Snapdragon.
Please note: Performing a factory reset is only advisable if you want to return back the phone to its original factory default settings and also fix some abnormal functions of the device.
Just make a back up copy of all your personal data before proceeding because the result of this process will delete all data you previously installed on the device.
This is a simple guide if you want to return the device to its original factory settings again.

Factory data reset of Kyocera M9300 ECHO:

1. On the main home screen, select menu
2. Select Settings, then Privacy
3. Select Factory data reset
4. Select Reset phone
5. Enter the password if prompted, then confirm by selecting Erase everything

Kyocera M9300 ECHO Hard reset, this may help if the phone experience some hang or frozen on some applications:

1. Turn the phone's power off. Take the battery out from the device, wait a couple of seconds and reinsert it back again.
2. Now, Hold the Volume Down button
3. Then press and hold the Power button until the device turns on
4. A menu will show up like: Fastbook, Recovery, Clear Storage, and Simlock
5. Just select Clear Storage by pressing the Volume Down button
6. Then press and release the Power button
7. Select Volume Up if YES and Volume Down for NO

Once the reset process is complete, the phone will then reboot to its factory fresh state settings.
Any data including third-party applications previously stored from the Kyocera M9300 ECHO already wiped or deleted.

LG Thrive Hard Reset, Wipe Data to Factory Default Settings

Here's a step by step instructions on how to hard reset the LG Thrive (for AT&T mobile USA).
2G Network     GSM 850 / 900 / 1800 / 1900
3G Network     HSDPA
OS     Android OS, v2.2 (Froyo)
CPU     600 MHz ARM 11 processor, Adreno 200 GPU, Qualcomm MSM7227 chipset
LG Thrive Hard Reset

Precautions: Performing hard reset process will delete or wipe all data from the. We highly recommend to have a back up copy of all your important files stored on the device.

LG Thrive Factory Data Reset procedures:

   1. On the main home screen, tap menu
   2. Select Settings, then Privacy
   3. Select Factory data reset
   4. Select Reset phone
   5. Enter the password if prompted, then select Erase everything.

If the LG Thrive is frozen: Reboot or restart the phone and do a hard reset through button combination.

   1. Turn the power off. , take the battery out and reinsert it back again
   2. Hold the Volume Down and Power Button
   3. A menu will then show up such as Fastbook, Recovery, Clear Storage, and Simlock
   4. Select Clear Storage by pressing the Volume Down button
   5. Press and release the Power button
   6. Select: Volume Up for YES and Volume Down for NO

Wait 'till the phone reboot, once the wipe process completes, the LG Thrive  will return to its original factory fresh state default settings.
All data including third-party applications will be deleted from the LG Thrive . You may need to re-install it back again.

HTC DROID Incredible 2 Hard Reset procedure

This is the steps and procedures on how to factory reset the HTC DROID Incredible 2 to clear all data and restore its original settings.

HTC DROID Incredible 2 Factory Reset procedure picture guide
The HTC DROID Incredible 2 General Info:
2G Network     CDMA 800 / 1900
                GSM 850 / 900 / 1800 / 1900
3G Network     CDMA2000 1xEV-DO
              HSDPA 900 / 2100
Announced     2011, April
Released        April 2011,

Note: Just make a back up copy of all of the important data stored or installed on the HTC DROID Incredible 2 before proceeding. The result of these process will delete and wipe all data that is stored on the device. However, this may or may not harm the data stored on the microSD card.

HTC DROID Incredible 2 factory reset on Menu Settings:

   1. On Home Screen, select MENU
   2. Select SETTINGS, select PRIVACY
   3. SElect FACTORY DATA RESET
   4. Select RESET PHONE
   5. If password is promted enter it... , Then select ERASE EVERYTHING

HTC DROID Incredible 2 Reset Application: This may help to forcely stop abnormality of an Application installed.  

   1. From a home screen, select the applications tab (located in the lower left).
   2. Select Settings.
   3. Select Applications.
   4. Select Manage applications.
   5. Select the appropriate application.
   6. Select Force stop.
   7. Select Clear data.
   8. Select OK.

HTC DROID Incredible 2 Hard Reset... A full reset procedures to clear all data and restore thed device to default factory settings. This may help for a severe problems like hang freezes or frozen devices.


   1. If the HTC DROID Incredible 2 is frozen, Shut the device POWER OFF., take the battery out from the device and reinsert back again.
   2. Hold the VOLUME DOWN BUTTON  then Press and hold the POWER BUTTON until the device turns on
HTC DROID Incredible 2 Hard Reset procedure picture guide
   3. Wait until this menu appears: Fastbook, Recovery, Clear Storage, and Simlock
   5. Select Clear Storage using  the Volume Down button
   6. Press and release the Power button
   7. Select: Volume Up for YES and Volume Down for NO


After the hard reset process completes, the HTC DROID Incredible 2 will then reboot and it will return back to its factory fresh state settings.