Followers

Samsung MORE D500 SPD SC6531 Flash File 100% Tested By Me

Model:Samsung MORE D500
CPU: SPD SC6531
Size: 16mb


Info:
CPU TYPE:SC6531 [65310000]
FLASH ID: 00EF006000170000
Flash Type:[WinBond] W25Q64DW Size:0x800000(8MB)
the phone has dual-flash ic,it reads flash size actually16(M)


DOWNLOAD

NOKIA C7 new mic ways 100% Tested

if u have c7 set with mic not working try this but 1st check mic,flex,and coils near keys.

last do this u can get 100% succses.


Infinity-Box Nokia [BEST] v1.74 released: many improvements and fixes

Infinity-Box Nokia [BEST] v1.74 released

- USB flashing improved
- XG213 flashing revised
- Maemo/MeeGo flashing improved
MeeGo flashing protocol re-written
Fixed "light" eMMC files flashing
Improved support of blank eMMC flashing
- WP8x flashing improved

- Service operations improved
- WP8x: improved operations in service mode with latest WP8 phones
- WP7x: improved operations in eMMC mode
- BB5/XGOLD/MAEMO: service operations improved

- User Data operations improved
- WP7x: Extraction core re-written, no more "damaged" pictures and other files
- WP7x: Added support for JTAG dumps: Generic , select "bin"
- WP7x: Added support for FLASH dumps: Generic , select "bin"
- WP7x: Improved Debug Data extraction: Phonebook/SMS
- WP7x: Improved "Documents" extraction
- BB5/XGOLD: Improved PhoneBook extraction on some new firmwares
- BB5 RAP3: Fixed PhoneBook writing on ancient S40 phones
- BB5: Gallery extraction revised (s60)

- Navi Manager updated
- Added 2-step file verification after download (take up to 30 second for big eMMC files)
- Added new firmware types handling
- Stability improvements
- DataPackage check/fix revised for "manual" download mode

- Navi Database updated
- Added all latest Asha and WP8x firmwares
- Added MTK-based Nokia phones firmwares

- Other
- GUI completely changed
- FBUS support revised: Flash/Service/UserData
- Many fixes and changes
- Stuff Files updated
- Ini updated


Infinity-Box Nokia [BEST] v1.74.5 released

- Misc
- Navi manager revised
- File selection revised
Fixed DCT4/XG110 file handling
Fixed Manual file selection
CRY/CRP/FPX flash files support revised

- Other
- Navi base updated
- Ini updated
- Work folders fast access from sw (logs/bf/data)
- Some bugfixes


Download software from Official Support Area:
server1 download area

Rockchip CPU Solution For Hang Problem/Pattern Problem/Password Without Adb working Tools-File Free Download

Rockchip CPU Solution For Hang Problem/Pattern Problem/Password Without Adb

1] Connect your device first in bootmode
[ there's a lot of bootmode on rockchip much better try all the buttons ]
2] Connect tab to p.c
3] RUN Software
4] Do following steps

Samsung i9300 Imei Null/Unknown Baseband Repair Done Odin Vs Z3x

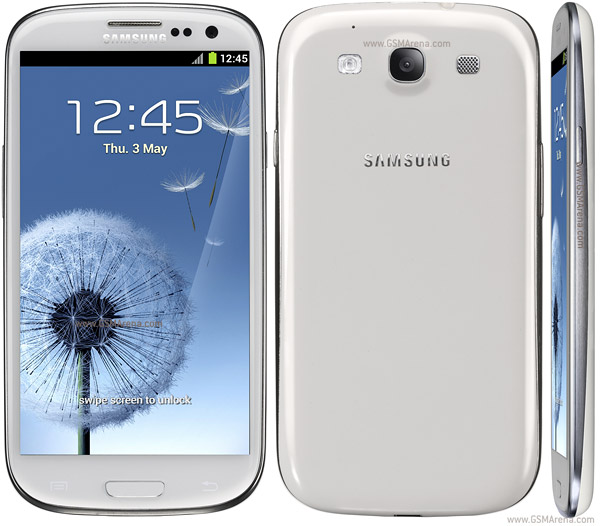
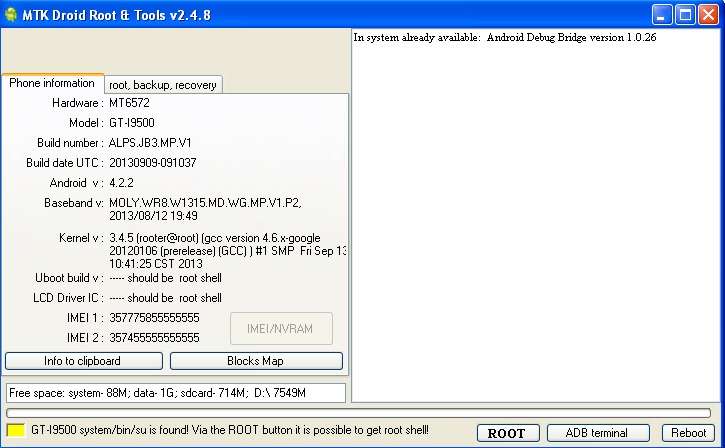
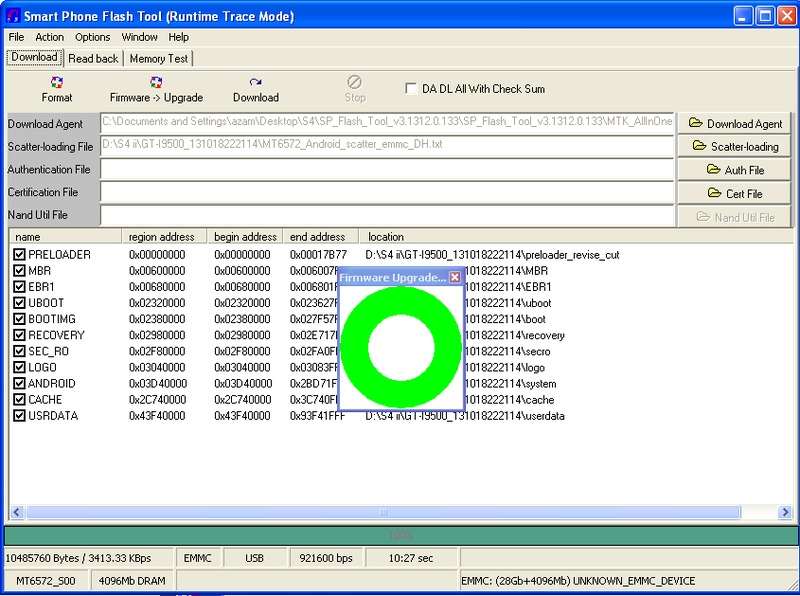
Samsung Clone Galaxy S4(i9500) MT6572 OFFicial Tested Flash File Free Download


Firmware Details:


Successfully Flashed & Recovered

Download Rom From Here

Download Flash Tool From Here

Samsung S7262 Galaxy Star Pro [Pattern/Google Lock Removed] Done By Odin Flasher

Download USB Driver for ZTE X950 (ZTE Smooth ) And Learn How To Connect your ZTE Device to Computer

We provide here the Official USB Driver for ZTE Smartphones and Tablets, All Drivers can be downloaded with Direct Links.

Download Link: Free Download ZTE X950 (ZTE Smooth ) USB Driver, Download the USB Driver for your ZTE Device via Direct Link.

How To Download and Install the ZTE X950 (ZTE Smooth ) USB Driver on your computer:


1- Click the above Download link.
2- In the Opened website select your Country from the Location Menu.
3- Select your Device type from Type menu (Smartphones, Tablets).
4- Select the Model of your ZTE device from Product menu (ZTE Amigo, ZTE Blade III,...).
5- Click on Blue Selected button at the right bottom corner.
6- At the new page select Downloads tab.
7- You will see the available USB Driver for your ZTE model, So click on the Download icon to start downloading.
8- After download the USB Driver pack you have to extract it to your desktop.
9- In case it has EXE program then install it like any other Windows application.
10- Restart your computer.
11- Use the USB cable to connect your ZTE device to computer, And let windows installs the suitable driver.
12- In case you did not find any EXE program inside the Driver pack, then connect the ZTE device to computer, And when Windows asks you for Driver Browse and show it the extracted Driver pack folder, So Windows will select the suitable one for yours.
13- It is better to restart the computer one more time.

Very Important Notices:
- In case your Country is one of these: Australia, China, France, Germany, USA, Sweden then you have to go to its special website, Look at the right upper corner and you will see Global drop-down menu, Just select your country to be redirected to.
- In case you could not find your device model in your country's model list, Then you can use the Search function at the top right corner below Global drop-down menu.
- In some cases the USB Driver package could be included inside the Software update package, So you can download it.

Useful Links:
- Unlock Your ZTE X950 (ZTE Smooth ) Online, Best Prices and Trusted Server.

Download USB Driver for ZTE Z993 Prelude And Learn How To Connect your ZTE Device to Computer

We provide here the Official USB Driver for ZTE Smartphones and Tablets, All Drivers can be downloaded with Direct Links.

Download Link: Free Download ZTE Z993 Prelude USB Driver, Download the USB Driver for your ZTE Device via Direct Link.

How To Download and Install the ZTE Z993 Prelude USB Driver on your computer:


1- Click the above Download link.
2- In the Opened website select your Country from the Location Menu.
3- Select your Device type from Type menu (Smartphones, Tablets).
4- Select the Model of your ZTE device from Product menu (ZTE Amigo, ZTE Blade III,...).
5- Click on Blue Selected button at the right bottom corner.
6- At the new page select Downloads tab.
7- You will see the available USB Driver for your ZTE model, So click on the Download icon to start downloading.
8- After download the USB Driver pack you have to extract it to your desktop.
9- In case it has EXE program then install it like any other Windows application.
10- Restart your computer.
11- Use the USB cable to connect your ZTE device to computer, And let windows installs the suitable driver.
12- In case you did not find any EXE program inside the Driver pack, then connect the ZTE device to computer, And when Windows asks you for Driver Browse and show it the extracted Driver pack folder, So Windows will select the suitable one for yours.
13- It is better to restart the computer one more time.

Very Important Notices:
- In case your Country is one of these: Australia, China, France, Germany, USA, Sweden then you have to go to its special website, Look at the right upper corner and you will see Global drop-down menu, Just select your country to be redirected to.
- In case you could not find your device model in your country's model list, Then you can use the Search function at the top right corner below Global drop-down menu.
- In some cases the USB Driver package could be included inside the Software update package, So you can download it.

Useful Links:
- Unlock Your ZTE Z993 Prelude Online, Best Prices and Trusted Server.

Download USB Driver for ZTE Z998 (ZTE Mustang) And Learn How To Connect your ZTE Device to Computer

We provide here the Official USB Driver for ZTE Smartphones and Tablets, All Drivers can be downloaded with Direct Links.

Download Link: Free Download ZTE Z998 (ZTE Mustang) USB Driver, Download the USB Driver for your ZTE Device via Direct Link

How To Download and Install the ZTE Z998 (ZTE Mustang) USB Driver on your computer:


1- Click the above Download link.
2- In the Opened website select your Country from the Location Menu.
3- Select your Device type from Type menu (Smartphones, Tablets).
4- Select the Model of your ZTE device from Product menu (ZTE Amigo, ZTE Blade III,...).
5- Click on Blue Selected button at the right bottom corner.
6- At the new page select Downloads tab.
7- You will see the available USB Driver for your ZTE model, So click on the Download icon to start downloading.
8- After download the USB Driver pack you have to extract it to your desktop.
9- In case it has EXE program then install it like any other Windows application.
10- Restart your computer.
11- Use the USB cable to connect your ZTE device to computer, And let windows installs the suitable driver.
12- In case you did not find any EXE program inside the Driver pack, then connect the ZTE device to computer, And when Windows asks you for Driver Browse and show it the extracted Driver pack folder, So Windows will select the suitable one for yours.
13- It is better to restart the computer one more time.

Very Important Notices:
- In case your Country is one of these: Australia, China, France, Germany, USA, Sweden then you have to go to its special website, Look at the right upper corner and you will see Global drop-down menu, Just select your country to be redirected to.
- In case you could not find your device model in your country's model list, Then you can use the Search function at the top right corner below Global drop-down menu.
- In some cases the USB Driver package could be included inside the Software update package, So you can download it.
UseFull Link: Free Samsung Firmware Download

All-in-one Smartphone Management Tool


The All-in-one
Smartphone Management Tool
Latest Version: V2.1.5.855
Software Size: 23.3MB
Last Updated: 2013-10-23
Operating System: Windows XP/Vista/7

DOWNLOAD

Samsung Galaxy Grand I9082 Flash Succesfully Step by Step Procedure Here

Samsung Galaxy Grand I9082 Successfully Flash Done By Odin

[Hang On Logo Problem Solved]


PIT File
baffin - Download - 4shared

Flasher
Odin 1.85.rar

Flash File
I9082XXAMB3_I9082ODDMB2_INU.zip

Tablet Tool ] Droid Tools

NO Need to To search More
all in one

.easy wipe
.touch fix
.camera fix
.some extra tools
.some tested firmwares

___________________________________>,
this is BETA EXE Only limited access only for wipe .
Download

Attached Thumbnails
Click image for larger version

Name:	885240_668171126550406_389223179_o.jpg
Views:	649
Size:	61.3 KB
ID:	316335   Click image for larger version

Name:	919335_668171149883737_1371391297_o.jpg
Views:	546
Size:	87.8 KB
ID:	316336   Click image for larger version

Name:	1397691_668171116550407_341136911_o.jpg
Views:	472
Size:	58.6 KB
ID:	316337   Click image for larger version

Name:	1401294_668171119883740_56770646_o.jpg
Views:	391
Size:	60.2 KB
ID:	316339   Click image for larger version

Name:	1403373_668171143217071_592795057_o.jpg
Views:	396
Size:	87.3 KB
ID:	316340

tablet a13 tzx-713b v1 hang logo with enable debug & Tools Free Download

HWK 2.3.0.3 Full Installer 28-10-2013

HWK 2.3.0.3 Full Installer here..
Its made for those have slowspeed internet connection...
Update date 28-10-2013

Just Download > Install Then Update box> Checkbox> Checkserver> install Do it step by step,

It will install 1 or 2 file and u will done within 2 minutes!!!

Download

Download Now

Samsung I9000 JB 4.3.1 Best Custom Rom stable nd tested 100% Working This

I9000 JB 4.3.1 Best Custom Rom stable nd tested by me


1st yu must have rooted yur mobile nd installed ClockworkMod recovery.

For non rooted mobiles Download below given firmware and update using Odin


I9000JPJV6.rar v2.3.3 | 165.9 MB

Odin 1.85 Download

To update yur mobile power off yur mobile nd press volume down+home+power button to put yur mobile into download mode.

Then connect yur mobile vit pc

Run odin nd select the extracted firmware from the zip file & select the single file into PDA field

After that press start & after finish reset yur mobile

Now time to root yur mobile before rooting in yur mobile setting/application/developer/ enable usb debugging

Now download CF-Root-XX_OXA_JVO-v3.2-CWM No need to extract
Now again put yur mobile into download mode by pressing volume down+home+power button

Then connect yur mobile vit pc

Run odin nd select the CF-Root-XX_OXA_JVO-v3.2-CWM_PDA file into PDA field nd press start.

Now yur mobile has rooted and good to install 4.3.1 custom rom

Download this Helly Bean 4.3.1 for I9000.zip & Google gapps for 4.3 and place the both files into yur internal memory card or ext sd card

Now boot yur mobile into clockwork recovery mode by pressing VOLUME UP +HOME+POWER while holding after 5sec release power key but keep pressing other keys until see the recovery mode. in recover mode 2 move next use volume button for select option press power button.

Before update yur custom rom in clockwork recovery goto wipe/ Wipe data/factory reset - Wipe Cache and Dalvik Cache

Then in clockwork recovery goto update from sdcard/internal sd card / select the Hellybean-20131024-galaxysmtd.zip to update yur mobile.

after update again update the gapps-jb-20130813-signed finish it vil reboot or yu can reboot


IQ DOCTOR BOX Firmware 1.63 Free Download

IQ DOCTOR BOX Firmware 1.63 Released-
What's new-
More support for pinfind for Spreadtrum cpu based phones
Like sc 6531/8825/8810 etc.
New easy GUI for box conjucion error.


Sony Xperia Z C6602 and C6603 step by step [ROOT] 100% Working For Me

I will explain How to root Sony Xperia Z C6602 and C6603?

The first thing that you need to do is download the Easy Rooting Toolkit.
Then take your phone, click on Settings >About phone and then click on the Build number five times to get Developer options allowed. Now tap on Developer options, tap on the switch to switch it on and confirm allowing development settings. Now you have to allow USB debugging. After that, go into Security, and under the „device administration“, click Unknown sources box.

On your computer, make sure that any ADB software is switched off so they do not interfere with the rooting process. Go to the folder where you downloaded the Easy Rooting toolkit, extract the whole folder and connect your phone with your PC via the USB cable. Click the Runme.bat file in your Easy Rooting toolkit, press enter and the rooting should start. A restore screen will appear on your phone: simply press „Restore my data“. Once it has restored, you need to press the following combination: *#*#7378423#*#*
Now go to Service tests>Display. When your display turns white, press enter on your computer and wait a couple of moments while it finishes. You will be asked to enter your PIN code on the phone and then the process should be completed and you will be able to find Superuser among your apps.


If you want to check if you have successfully completed the whole procedure, you can download this file and check it !!!

Mobogenie_Setup_2.1.23_16 Free Download

China Spice M-5008 Flash FIle

China SPice M-5006 Flash File

China SPice M-5005n Flash FIle

China Spice M-5005 Flash FIle

China SPice M-4580n Flash FIle

China SPice M-4580n Flash FIle


CHina SPice M-4580dv Flash File

China spd adnroid phone imei change just one click Free Download

How To Setup Hwk Saras Box With NEw Update?

The latest release of the Panel software contains a new Backup and Restore Registry option, we urge our customers to use it.

1. Uninstall ALL previous versions, you MUST uninstall HWK Suite BEFORE trying to uninstall HWK Support Suite Setup.
2. Install UFSx Support Suite Setup
3. Connect your UFSx+HWK before running the UFSx Control Panel
4. Run UFSx Control Panel
5. Switch to the "Hardware" Tab
6. If you only have one UFSx connected it will be selected, if more than one, select the check box next to the required UFSx. You can click "Scan Boxes" to refresh the list if you have connected further boxes since opening the Control Panel
7. Click "Check Box"
8. Click "Update Box"
9. Click "Check Box" - Make sure "Box Status" = "True" or "Bad Software" and "Server Status" = "Support Ok", before proceeding
10. Switch to the "Software" Tab
11. Amend "Application Install Path" and/or "Nokia Install Path", if required.
12. Click "Check Server"
13. Click "Install"
14. If you have more than 1 UFSx+HWK run steps 5-13 for each UFSx+HWK (NOTE: You must install something at step 13)
15. Switch to the "Software" Tab
16. Click "Check Box" - Make sure "Box Status" = "True" and "Server Status" = "Support Ok", before proceeding
17. Click "Backup Registry" - Save this file on a removable media.

If you decide to re-install Windows, you can Install the setup suite, run the panel and click "Restore Registry", then "Check Box", this process should save you some install logs.

The registry backup can also be restored if you get some unexpected auth error when all was working fine before, this happens due to some registry cleaning software.

UFSx+HWK+UFST Release 28/10/2013 Free Download

Samsung S2 I9100 update field revived via flashing procedure and firmware Free Download

Samsung S2 I9100 update field revived via flashing(procedure and firmware inside)

Problem:
Tools:

1.CA-101 USB CABLE
2.ODIN V3.07

Firmwared:http://www.4shared.com/zip/YNNI6MF7/i9100_412_jelly_bean_cowby_bTESTED FIRMWAREDeb.html
Procedure:

1.Set phone in dwnload mode
2.How? press vol-down home button +power button
3.Open odin 3v.o7 select PDA.and browsed fimrware
4.Un-check Repartition in odin
5.Connect USB cable and wait phone detect at odin
6.Hit start and wait in few mins.and your done

Screen shoot


Finish and done phone